| Index | Better SplitButton Properties » |
Quick Start
Table of Contents
Learning Resources and Getting Support
Tutorial Prerequisites
-
Visual Studio 2010 / 2008 / 2005
-
.NET Framework 2.0 / 3.0 / 3.5 / 4.0 (make sure it is not a "Client Profile" or "Compact Framework" - these are not supported)
-
Visual C# or Visual Basic
Step-by-step Tutorial
Start with a new "Windows Forms Application" project. A designer with empty Form appears. Display the Toolbox window (View - Toolbox):
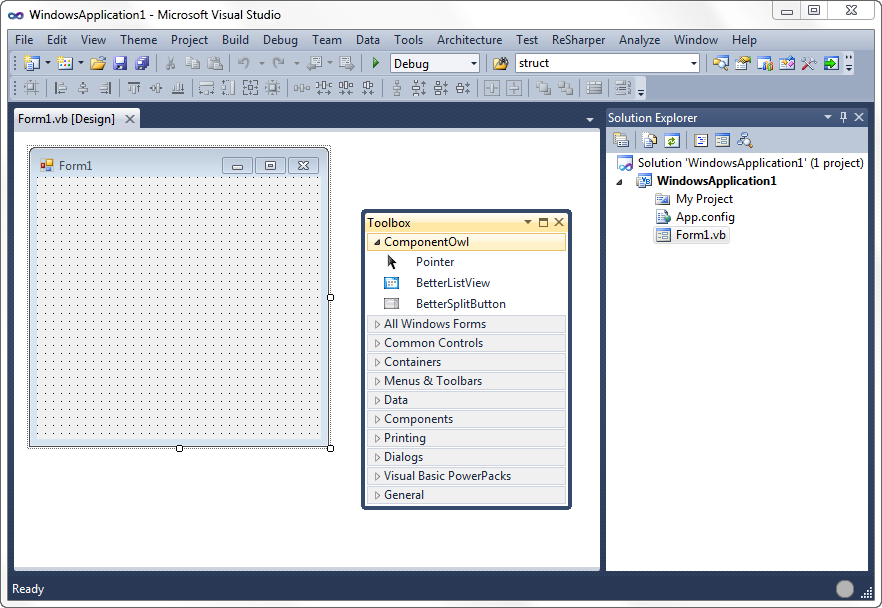
The Toolbox should contain a new tab called "ComponentOwl" containing all the installed component from ComponentOwl, including Better SplitButton.
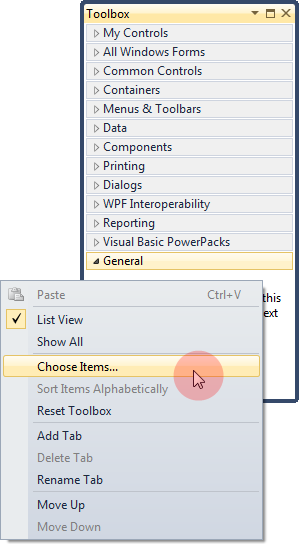
If you chose not to integrate component in Visual Studio during installation or the component have not been successfully integrated, please follow the next steps.
Right-click on empty area of the Toolbox window and select "Choose Items...":
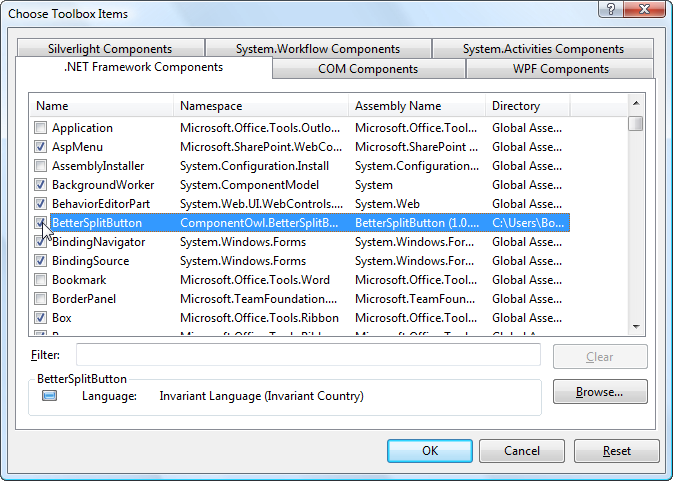
In the "Choose Toolbox Items" dialog, select the ".NET Framework Components" tab. If the comonent has been properly installed, it will be already listed here. If you find it, make sure the newest version is checked (e.g. 2.1.0.0 instead of 1.0.0.0) and click "OK":
Now the component should appear in your Toolbox. Select the component and place it on designer surface:
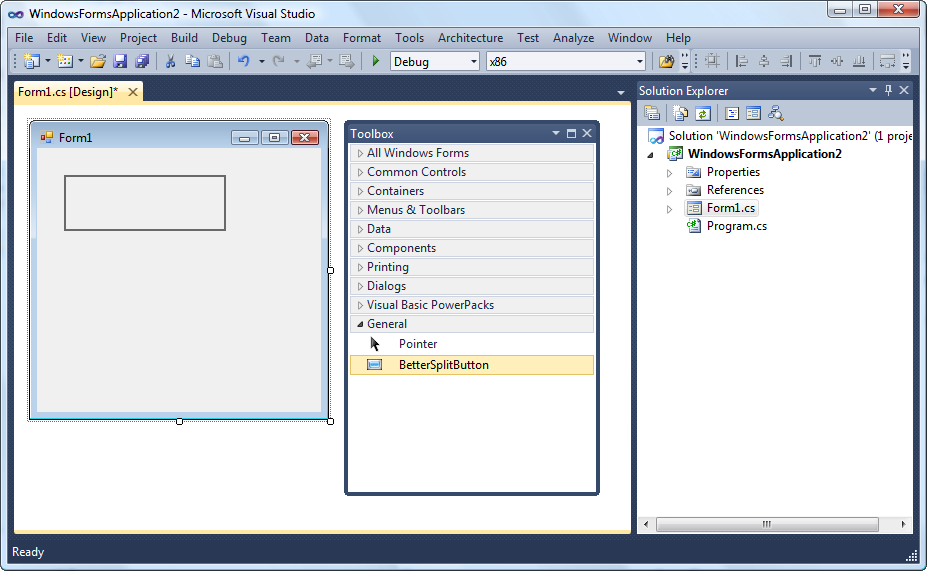
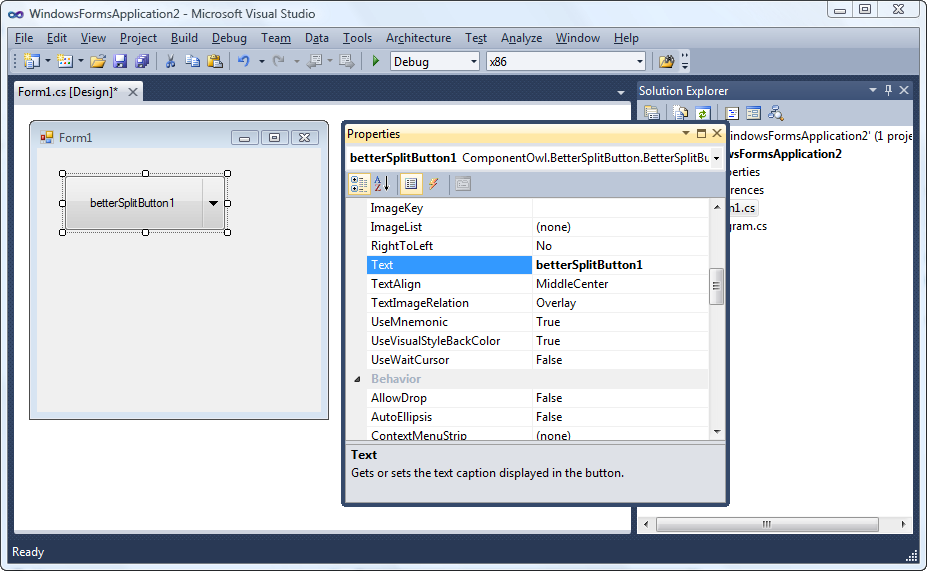
Now you can design Better SplitButton the same way as any other control:
Installation Troubleshooting
If the component does not appear in Toolbox, make sure that your target framework version is a full-featured .NET Framework 2.0, 3.0, 3.5 or 4.0. The Compact Framework or Client Profile are not supported.
You can also try the "Reset Toolbox" option from the Toolbox context menu, restart Visual Studio and try to add the control again.
Sometimes even the Toolbox can get corrupted (known issue on Visual Studio 2010) and its cache needs to be cleared. Simply remove all ".tbd" files from this folder:
Vista/Windows 7:
\Users\<user>\AppData\Local\Microsoft\VisualStudio\10.0\*.tbd
Windows XP:
\Documents and Settings\<user directory>\Local Settings\Application Data\Microsoft\VisualStudio\10.0\*.tbd
Make sure the Visual Studio is not running when removing the files. The Toolbox should reload its default items when opened.
Updating to Newer Version of Better SplitButton
If a new version of Better SplitButton is released, to update to newer version, simply download and install the new version. The installer will prompt for updating to a new version.
The DLL with the component (betterlistview.dll) is installed usually in Program Files folder, so if you use copies of the library on other locations on your disk, replace the old copies with the new version.
The licenses.licx file in your project may also point to an older version of Better ListView. To update licenses.licx open some form with Better ListView in Windows Forms Designer and compile. A new line will be added to the licenses.licx for the new version of the Better ListView. You can delete the line with the reference to older version, e.g.:
ComponentOwl.BetterListView.BetterListView, BetterListView, Version=1.0.0.0, Culture=neutral, PublicKeyToken=e6c91a3add447be2
should be switched to:
ComponentOwl.BetterListView.BetterListView, BetterListView, Version=2.2.0.0, Culture=neutral, PublicKeyToken=e6c91a3add447be2
if 2.2.0.0 is the updated version of Better ListView. You can do the update of licenses.licx file with text editor within Visual Studio, if you know the new version number.
Learning resources and getting support
The documentation and learning resources include:
-
HTML documentation
-
Sample projects in C# and VB.NET
-
Samples explorer (which includes source code snippets as well)
-
Class reference (technical documentation)
You can find all these resources in Start Menu - Better ListView.
The C# and Visual Basic Samples are located at:
Vista/Windows 7:
\Users\<user>\Documents\ComponentOwl\Better SplitButton Samples
Windows XP:
\Documents and Settings\<user directory>\My Documents\ComponentOwl\Better SplitButton Samples
Make sure the Visual Studio is not running when removing the files. The Toolbox should reload its default items when opened.
We will happily answer any of your questions and provide further assistance. Just email us at support@componentowl.com. Or, you can use the online form at www.componentowl.com/support.
| Index | Better SplitButton Properties » |
| Better SplitButton Documentation | Copyright © ComponentOwl.com |